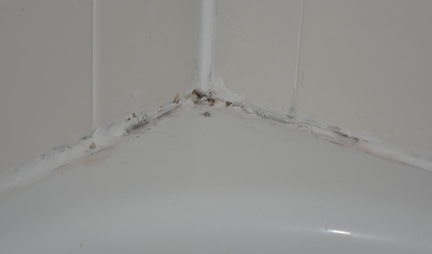
Does Your Bathtub Caulk Look Gross?
Whether you’re renovating your bathroom or repairing water damage, caulking is an important step in preventing serious water damage to your bathroom. Since the area around your bathtub is especially exposed to humidity it is especially important to do this carefully and correctly. While it may seem daunting at first, with adequate preparation and a few straightforward steps you can caulk your bathtub yourself with effective, professional-looking results.
Simply follow these seven steps:
1. Start Clean
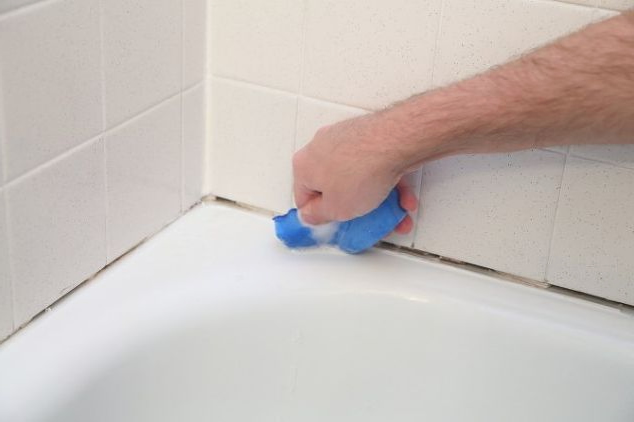
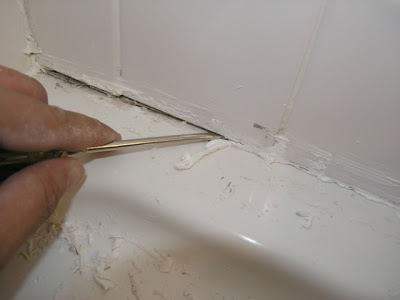
If you are re-caulking your bathtub, be sure to remove all of the old caulk, and any mildew or soap scum from around the edge of the tub. Once the surface is clean wipe it once more with denatured alcohol to remove moisture. For a new bathtub begin with this step.
 |
 |
2. Use the Right Caulk
it’s important to make sure that the caulk you have is meant for bathroom surfaces, so it properly guards against moisture and stands up to regular wear with built-in mildew protection. You can find this at most home improvement stores in a variety of colours to suit your needs.
3. Tape
Carefully apply masking tape to the the areas surrounding where you will apply the caulk. It’s important to make sure that the edge of the tape is exactly where you want the caulk to end, and will make sure the end result looks neat and professional. It will also make clean-up easier once you’ve finished.
4. Load the Caulk into the Gun
You won’t be able to apply the caulk without a caulk gun. Use a sharp knife to carefully remove the tip of the applicator. There should be score marks to make this easier. You will also need to piece a protective barrier once you’ve removed the tip. To do this gently insert a nail or piece of wire inside of the tip. To make sure things are working properly hold the gun over a wastebasket and press the trigger. This should cause the caulk flow out gently. Note that it should not squirt out at a high pressure or drip. If the pressure seems excessive, carefully cut the tip a bit lower. Release the lock on the gun to relieve pressure once finished.
5. Begin Caulking
Point the tip of the caulk gun at the seam of your tub, slightly above the surface but not touching. Gently press the trigger and allow the caulk to flow into the seam, steadily moving it backwards to create a straight and uniform line. To create an even flow, release the trigger before it compresses all the way, and then begin again. It is important not to stop the flow until you reach a corner. Repeat this process for each of your seams.
6. Smooth
Run your finger along the seam between the tape to remove excess caulk and smooth things evenly. Keep a rag or paper towel on hand to remove this from your finger after you reach each corner. Carefully remove the tape, and use your finger to smooth any other imperfections.
7. Wait
To make sure the caulk is properly set and the barrier is sealed it must cure for twenty-four to thirty-six hours. This is the most important step, as proper curing will ensure long-lasting and effective caulking.
Going slowly is key when replacing caulk yourself, especially if it’s your first time, but as you can see there is nothing to be intimidated by. If you’re still wary, try it out by practicing on a small piece of cardboard before you move on to the real thing.
Here is a great video to walk you through the steps: